Selected templates currently in use as of 03/20/2015 along with their "All Active Indicators" list
The following templates have been set up so that I did not need 2 separate templates when switching between
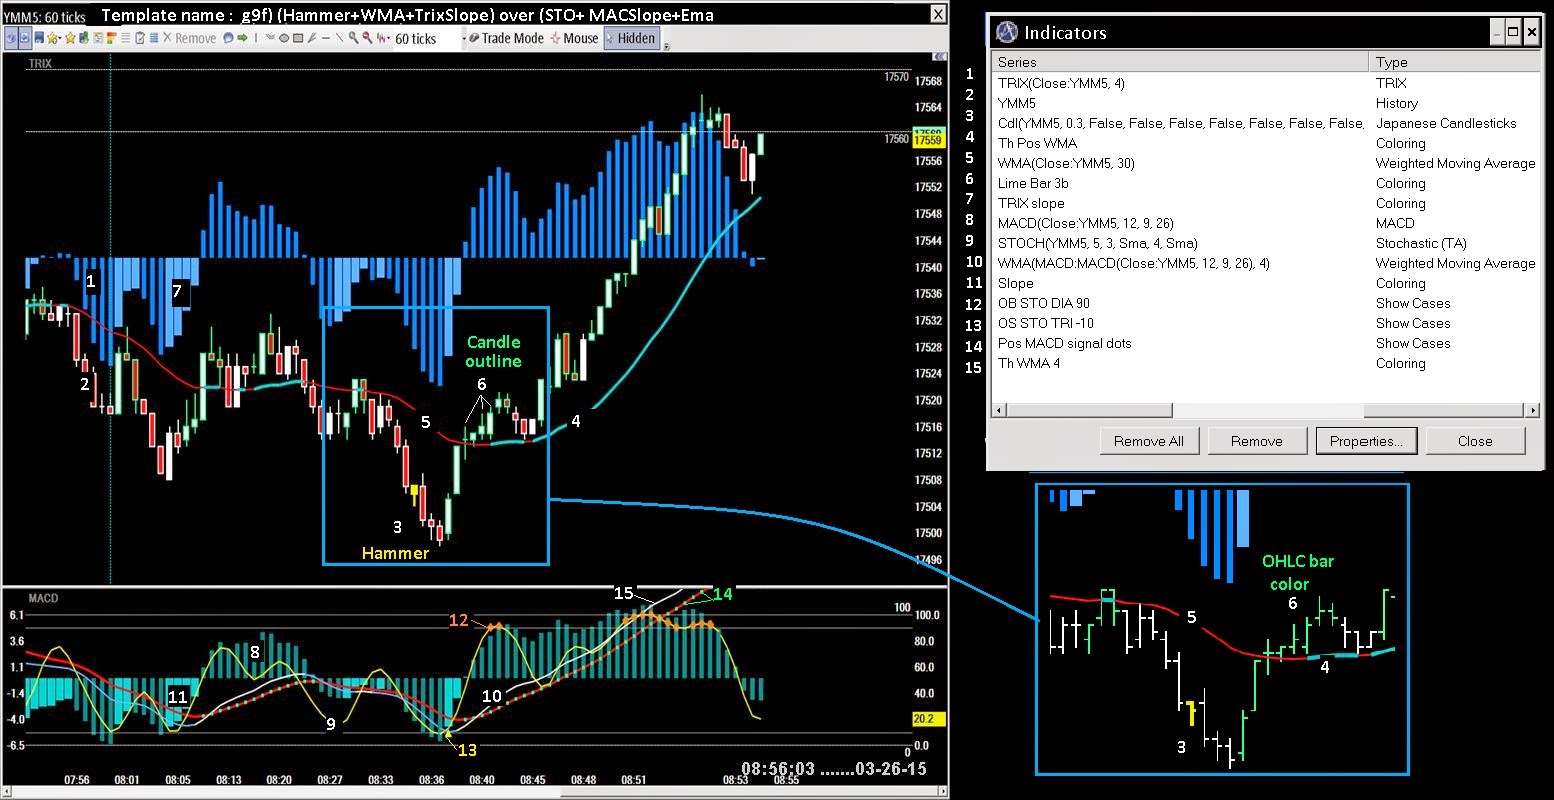
OHLC bars and Candlesticks.
%2B(Hammer%2BWMA%2BTrixSlope)%2Bover%2B(STO%2B%2BMACSlope%2BEma.jpg)
The next one will usually have Trade Mode selected for utilizing it's on-chart order entry system.
The next one will usually have Trade Mode selected for utilizing it's on-chart order entry system.
You do not need to turn off Trade Mode to make the switch between the types of bars showing but
you do have to turn T-Mode off to change the study height or use the drawing tools.
%2B%2BGWB%2Bor%2BWRC%2B(Yel%2Bhammer)WMA(MACDh%2BSlope)%2B(Sm%2BPB%2BSTUDY.jpg)
The next ones I use for the intermediate term, for drawing trend lines and using other drawing tools.
I also use them for my longer term "Spotter charts".
%2B%2BGWB%2Bor%2BGRC%2B(Hammer%2BWMA%2BMAC%2BSlope)%2Bover%2B(STO%2BMAC%2BEma.jpg)
%2BBars%2Bor%2Bcandles%2B(Hammer%2BWMA%2BTRIXh)%2Bover%2B(STO%2B2%2BMACh%2BEma.jpg)
%2BBars%2Bor%2Bcandles%2B(Hammer%2BWMA)%2Bover%2B(STO%2B2%2BMACh%2BEma%2BSlope.jpg)
The next two are set up mainly for displaying daily charts...
.....Daily%2B....%2BWRC%2B%2B(STO%2Band%2BTh%2BMACD%2Bslope.jpg)
.....Daily%2B....%2BWRC%2BMAC%2BEMAs%2BSlope%2B(STO%2BTh%2BTRIX%2BSlope.jpg)